
Using Parallels on a New 24-inch iMac
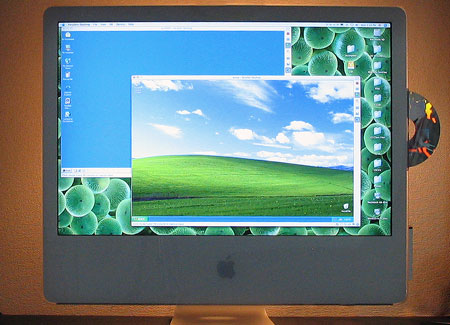
W2K and WXP alive on the Mac. Note the backlight, by the way; I find it helps a lot to make the screen brightness easier on the eyes.
The first thing you should know about running Parallels if you have one of the new Core 2 Duo iMacs is that the version of Parallels that download directly from their site won’t work–it will cause kernel panics, crashing your machine from the start. Instead, you have to get the latest build–which, at the time of this writing, is build 1908, which can be downloaded from this page.
Once you have that, it’ll all be cool. I installed Windows 2000 for starters, from an install disk my school gave me (we no longer use the OS, so they gave me a spare). With the new version of Parallels, it installed very nicely. When you make a new virtual machine, you’re supposed to check the CD-ROM settings to make sure that the optical drive will be recognized properly; since I was installing from a CD, the native settings were all I needed. Then you click the “Play” button on the right-hand toolbar (where the original version of Parallels would crash) and a virtual DOS setup starts, recognizes the CD-ROM, and you go from there.
After it installed, the Windows 2000 OS seemed to run fine–but was limited to a screen resolution of 640×480 pixels and a color depth of 4-bit (16 colors). It turns out that you have to install “Parallel Tools” in order for the W2K drivers to recognize your actual PC hardware. To do this, you go to the “VM” menu and select “Install Parallel Tools…” while your virtual OS is running. Then color and resolution work however you want them to. After you shut down the virtual OS, you can even go into “Edit” mode and create custom screen resolutions to fit your fancy.
After that test, I tried installing Windows XP, and had the same result–it installed just fine and started running without incident. In fact, XP instantly recognized my screen size, and allowed for better display settings from the get-go. However, there is still a big advantage to installing Parallel Tools: smooth transfer between operating systems.
In default mode, each virtual OS within Parallels will “capture” the attention of your cursor; the cursor will only stay within the bounds of the Windows virtual desktop, even if the virtual machine is not full screen. In order to get back to the Mac OS, you need to hit the Control and Option keys simultaneously. After installing Parallel Tools, however, this is no longer necessary; instead, the cursor will simply switch to whichever OS it happens to be hanging over at the time, making for much smoother transitions.
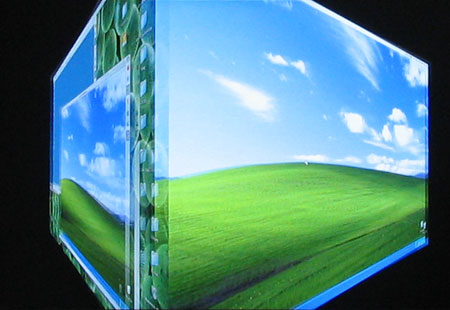
Switching to a full screen is similarly easy to do. Just hit Alt+Enter, and a nice Mac rotating 3-D cube effect switches you to full-screen mode in Windows. In fact, once you enter full-screen mode, Parallels automatically adjusts the Windows OS screen resolution to match your monitor, so the resolution remains clear and sharp. In addition to allowing full video control and smooth cursor transfer, Parallels Tools allow for audio to work well, cross-OS copy-and-pasting (text and small images only, at present), and shared folder privileges. At this time, Parallels does not allow for drag-and-drop transfers between OS’s–but give them time, and probably they’ll get that enabled as well.
If you have an Intel Mac, want to use Parallels, but are having trouble, check out the Parallel Forums. For some reason, Parallels doesn’t appear to have a link to here from any of their main pages–but it is a enormously useful resource.
Good stuff. Keep the information coming, Luis. I’ll be just a few steps behind you later this week!