It works!
I will give a complete telling of the whole saga of the repair below; it’s rather long, and possibly boring to anyone too experienced or just not interested in stuff like this. However, if you have ever thought of iPhone DIY repair, this might be of interest to you.
A few weeks ago, I dropped the phone on the pavement, about the 20th or so time I had dropped it. Before, nothing happened except for, apparently, one time when a small crack appeared on the lower right corner, away from the screen. Didn’t even notice it until later.
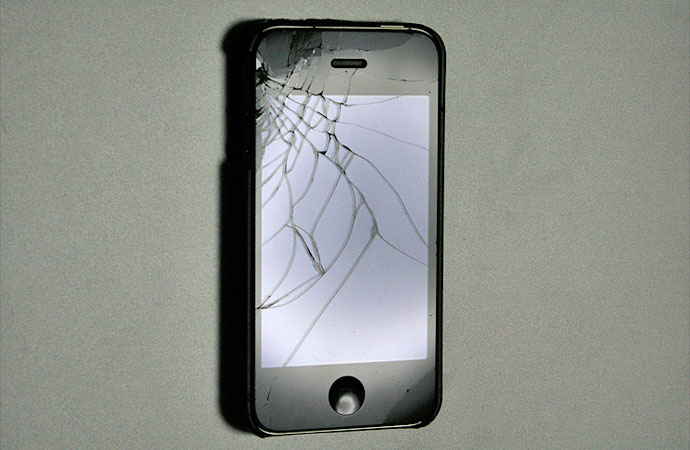
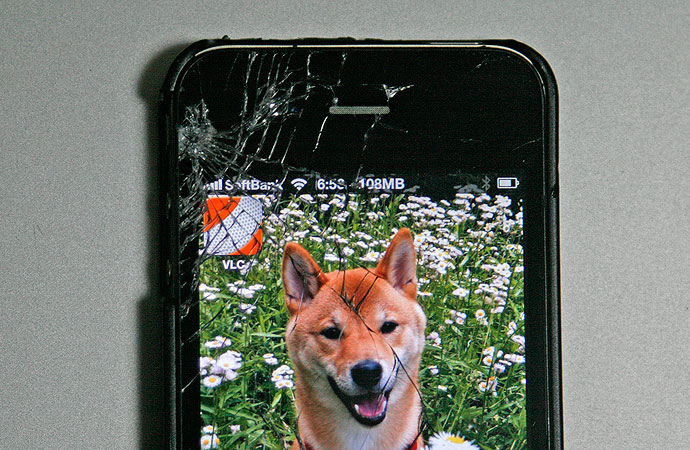
This time, it was impossible not to notice; the screen was shattered. It still worked, but was hardly comfortable.
After checking things out, I discovered that you could order a new front panel for a surprisingly cheap price–about ¥3000 in Japan ($37), or $27 in the U.S. This includes not just the front glass, but the touchscreen mechanism and the LCD screen and backlight. I presume it’s the full retina display. Hard to believe it’s so cheap!
Of course, the hard part is the repair job. Places in Tokyo advertise repairs for around ¥10,000, or $126 (though some places advertise for less), but repairing it myself held a certain appeal. I knew it would be hard, perhaps frustrating, and I might end up with a bricked phone. However, it would be a great experience, and could help me become more adept at cheaper DIY repairs, as I have become with laptops and desktops.
So, I ordered the LCD replacement part, being careful to select an iPhone 4 part, and not an iPhone 4S screen. I also had to order a toolkit with the right drivers, a guitar pick, a good pair of tweezers, and a few plastic tools. That was cheap, but came separately.
From there, it was time for Nightmare With Amazon 3rd-Party Sellers. The tool kit, which had the slowest delivery time, got canceled one day after I ordered it, with no explanation. So the screen came and I had to wait two days for a re-ordered toolkit. Then, only after having disassembled the phone, I discovered that the LCD screen was also a botched order–more on that below.
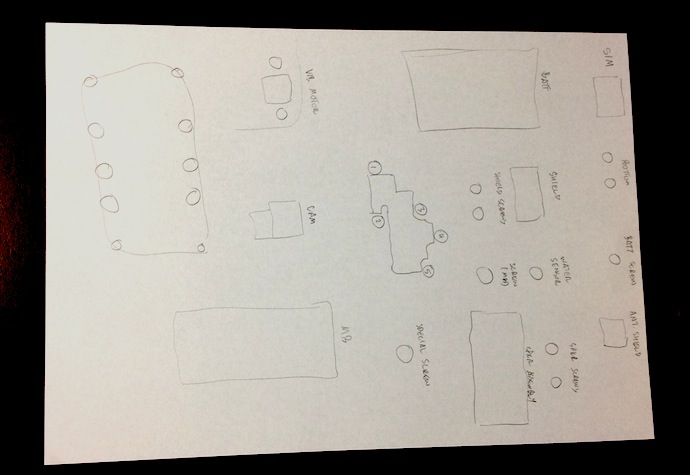
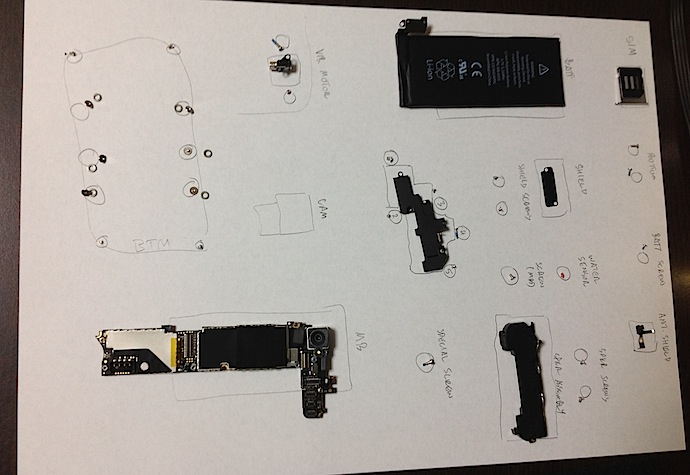
Before I started the repair job, I did some serious prep work. I researched the job generally, and found two videos on the complete process. I watched the videos beforehand, taking notes of all steps, as well as all parts involved. I even numbered the screws (26 of them!). I prepared a piece of paper to lay down the parts on, carefully drawing labeled outlines for all parts, little circles for each screw. All were in order of assembly.
Taking it apart the first time took more than an hour. I was extremely nervous about bending wires too far, or pulling things out too hard. For this repair, you need to take the phone almost completely apart, as it disassembles from the back and everything must be removed to allow access to the screws holding the front screen in place. Let me detail the basic steps; skip the next paragraph if you’re not interested.
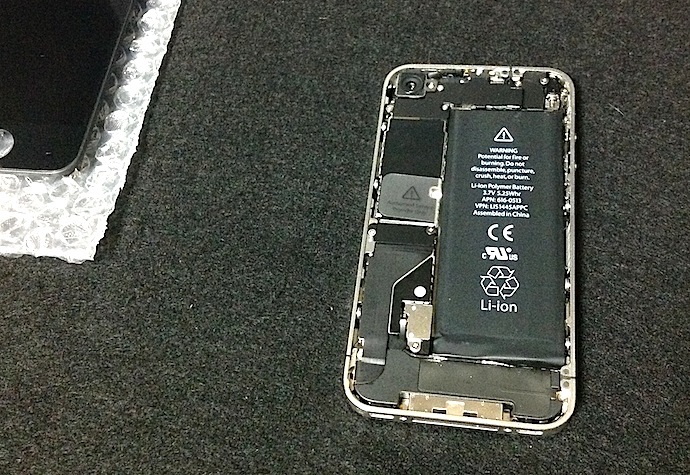
First, you remove the SIM card by using a small paper clip and pressing real hard in the hole; it just pops out. You remove the two screws at the bottom on either side of the connector port. Then, the back panel slides off with surprising ease. You remove a screw from the battery connector and remove the connector along with the tiny antenna shield. The battery comes out with a little difficulty as it is glued into place. Then a shield with 2 screws comes off from a ribbon connected to the motherboard, then the ribbon itself is detached. Detach the antenna cable, then remove a screw with a water sensor (a small sticker-like thing) from the motherboard, then remove two more screws at the bottom so as to remove the speaker/antenna assembly.
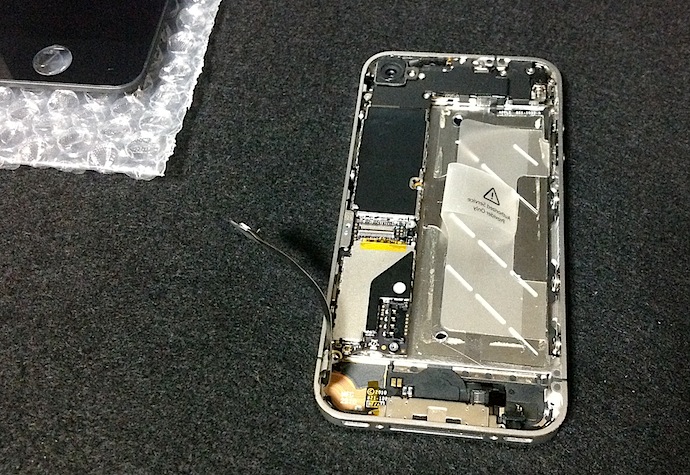
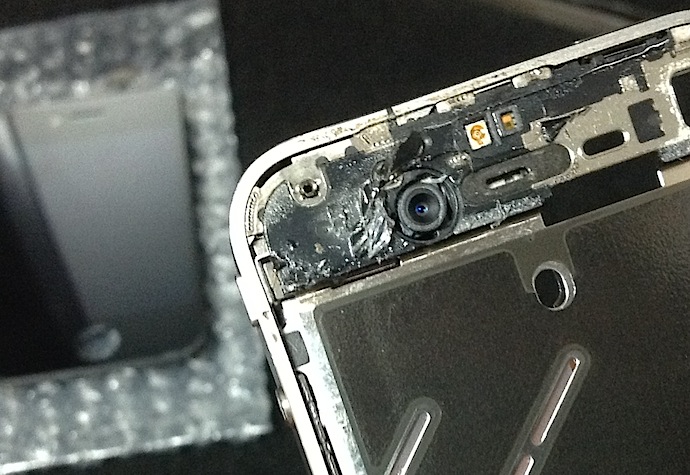
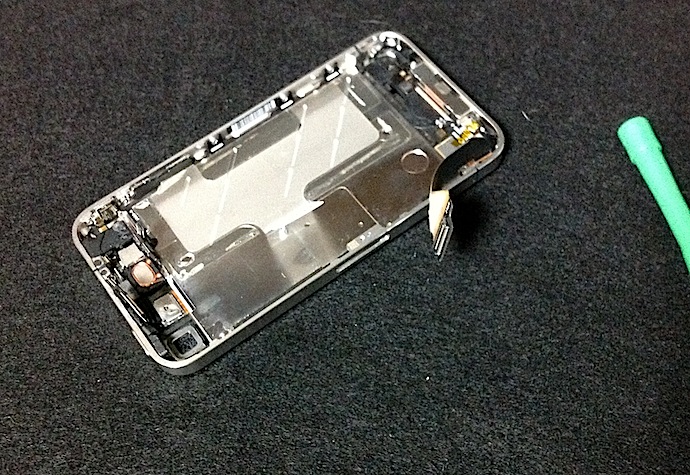
Then there are 5 screws (all different!) holding an EMI shield in place over 5 motherboard connectors; remove all that, then 3 more screws and the vibrator, then detach the rear camera. You can then detach the 5 remaining motherboard connectors (2 are for the LCD), and lift out the motherboard. Removing the screen requires that you unscrew 10 screws from the frame–3 on each side (with washers), and one each from every corner. Then you spend maybe 3-5 minutes carefully prying the screen from the frame which it is glued to, careful not to yank it out. The two LCD panel cables run through a small slot in the center frame, and need to be guided out carefully when the front panel is loose. I had to remove broken glass that had buried itself in the glue on the frame, but other than that, everything looked OK.
Whew! Like I said, that took more than an hour. When I was finished, I was more or less a nervous wreck. However, I had done it, and apparently had avoided destroying anything. So, I got the replacement LCD, threaded the two connectors through the frame, and got ready to snap it into place.
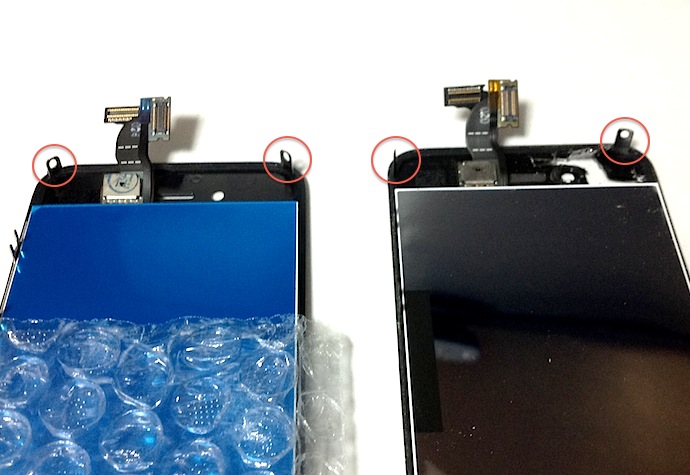
It didn’t fit. That’s when I discovered it was the part for the iPhone 4S, in which the top two corner screw brackets are placed slightly differently than for the iPhone 4.
Now, I had ordered the part for an iPhone 4, not 4S. I checked the order; even the image on the seller’s page showed an iPhone 4 part (although when I bought it, I didn’t know the difference). I also checked the invoice, which again said “iPhone 4.” The package said “iPhone 4.”

Obviously, this was their screwup. Disappointed, I covered up the parts sheet, bagged the major pieces, and got to dealing with Amazon.
A few days later, the new part arrived, and was in fact the right part. That evening, I set about putting it back together. In doing so, I hit some snags and made a few mistakes. First, three tiny pieces fell off which no tutorial had warned against, and as I did not see where they fell from, I had to search for detailed images of all the parts so I could identify what they were.
A small black rubber rectangle was the first to fall off. Eventually, I tagged it as a cushion between the speaker assembly and the bottom of the frame. That got super-glued back into place. Second came a small screw holder for part of the motherboard; that got carefully placed back, but stayed loose until the screw went in. And last, a small, grooved black rubber strip from somewhere, I could not figure out. I left it out, hoping it was not vital.
In addition to that, I could not fit the motherboard in right, and therefore the EMI panel did not fit on 100% correctly. It seemed to fit enough, so I foolishly (optimistically) left it as it was. I was prepared to open it back up and fix any or all of these issues if the phone did not work.
I put it all back together, it closed up OK, and I switched it on.
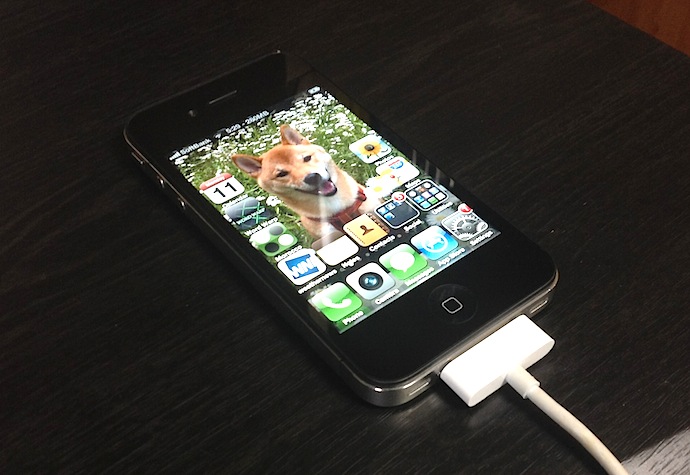
It worked!
I did notice a small glitch: the front panel was not flush with the frame, and you could see the LCD panel back-light leaking out. I decided to live with it. I used it enough to establish that all the functions were indeed operational, and happily plugged it in to charge overnight.
The next morning, I turned it on. The screen was black, and stayed that way.
Sometime during the night, the LCD part of the panel failed. In the morning, the backlight turned on, and the touchscreen worked, and I could operate the phone blindly. But no picture. Yargh.
So, I waited until I had time again, and then took the whole thing apart. It took much less time this time around, and I was much more confident and skilled at it. I discovered a few things I had done wrong. First, the small rubber part I could not identify was a cushion at the top of the motherboard–right where the LCD cables passed around it. Crap. That might have resulted in the cables getting fried.
Second, When I took the front panel off, a blue film came off the back of the LCD. I thought the screen was falling apart, but then realized that the blue film was there for protecting the part in shipment and should have been removed. I hadn’t done that because I thought it was part of the screen; the part came with no instructions, and none of the online tutorials mentioned it. The reason why is the bane of all such documentation: the people writing it assume that the people watching it know about such things, forgetting that people who get these tutorials get them because they don’t know these things.
So, crap again. If the unprotected cables were not the cause, then the added pressure on the LCD screen from the unremoved film may have been.
I re-assembled everything, making sure I made no mistakes this time. The front panel went on firmly, the motherboard went in right, the connectors all seemed to snap in, the EMI shield fit right this time, and the whole phone went back together perfectly. Again, it took a lot less time than before, but still more than an hour for the whole process.
After it was all back together, I turned it on.
The screen was still broken. However, this time there was a bonus: the touchscreen was now broken too.
I determined that the phone still worked; I could receive calls (just not answer them), and when plugged into a computer, iTunes showed the phone as normal.
I resolved that I had, one way or another, broken the screen. I spent the next day trying to decide whether to buy another LCD screen and risk another repair job.
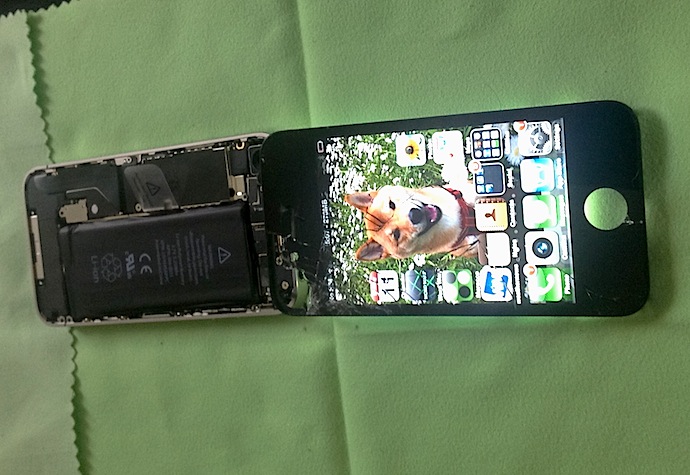
I decided to do just that, but wanted one final test to make sure it was a problem with the LCD panel part, and not a broken motherboard connector. I opened the back panel and unplugged the battery. I removed the EMI shield protecting the LCD connectors. Then I unplugged the installed, new LCD without removing it, and instead plugged in my old, shattered front panel, hanging outside the whole shebang. I turned it on, and lo, the phone worked. That proved that any problem was with the LCD part only, and so a re-order would stand a fair chance of repairing it.
So I unplugged the ungainly old panel, plugged all the current parts back into place, and closed it up, so I could then go to my laptop and order a new LCD panel.
However, just for shits and giggles, I turned it on, to make triple-sure that the LCD was indeed broken.

The screen worked. LCD screen and touch panel both.
I was floored. My only guess is that somehow, the LCD connectors were not properly placed either of the previous two times–despite the fact that I swear they snapped into place both times, and were certainly secured by the EMI shield pressing down on them afterwards.
All night, I kept on turning it on again and again to make sure it was still working. I figured it could go any time. I still do.
Well, that was about a week ago. Hard to believe, it seems longer than that. But the phone still works. Not a problem since. So, for about three and a half thousand yen, and some frustration, I got a perfectly working phone again. And, in the bargain, I got a good deal of experience disassembling and re-assembling the phone.
All in all, it was worth it.